Scenarios
Overview
A Scenario is the smallest executable unit in Testinium Suite – Test Automation.
It represents a single test case or a logical test flow defined within your test code. Every execution in the system ultimately runs at the Scenario level.
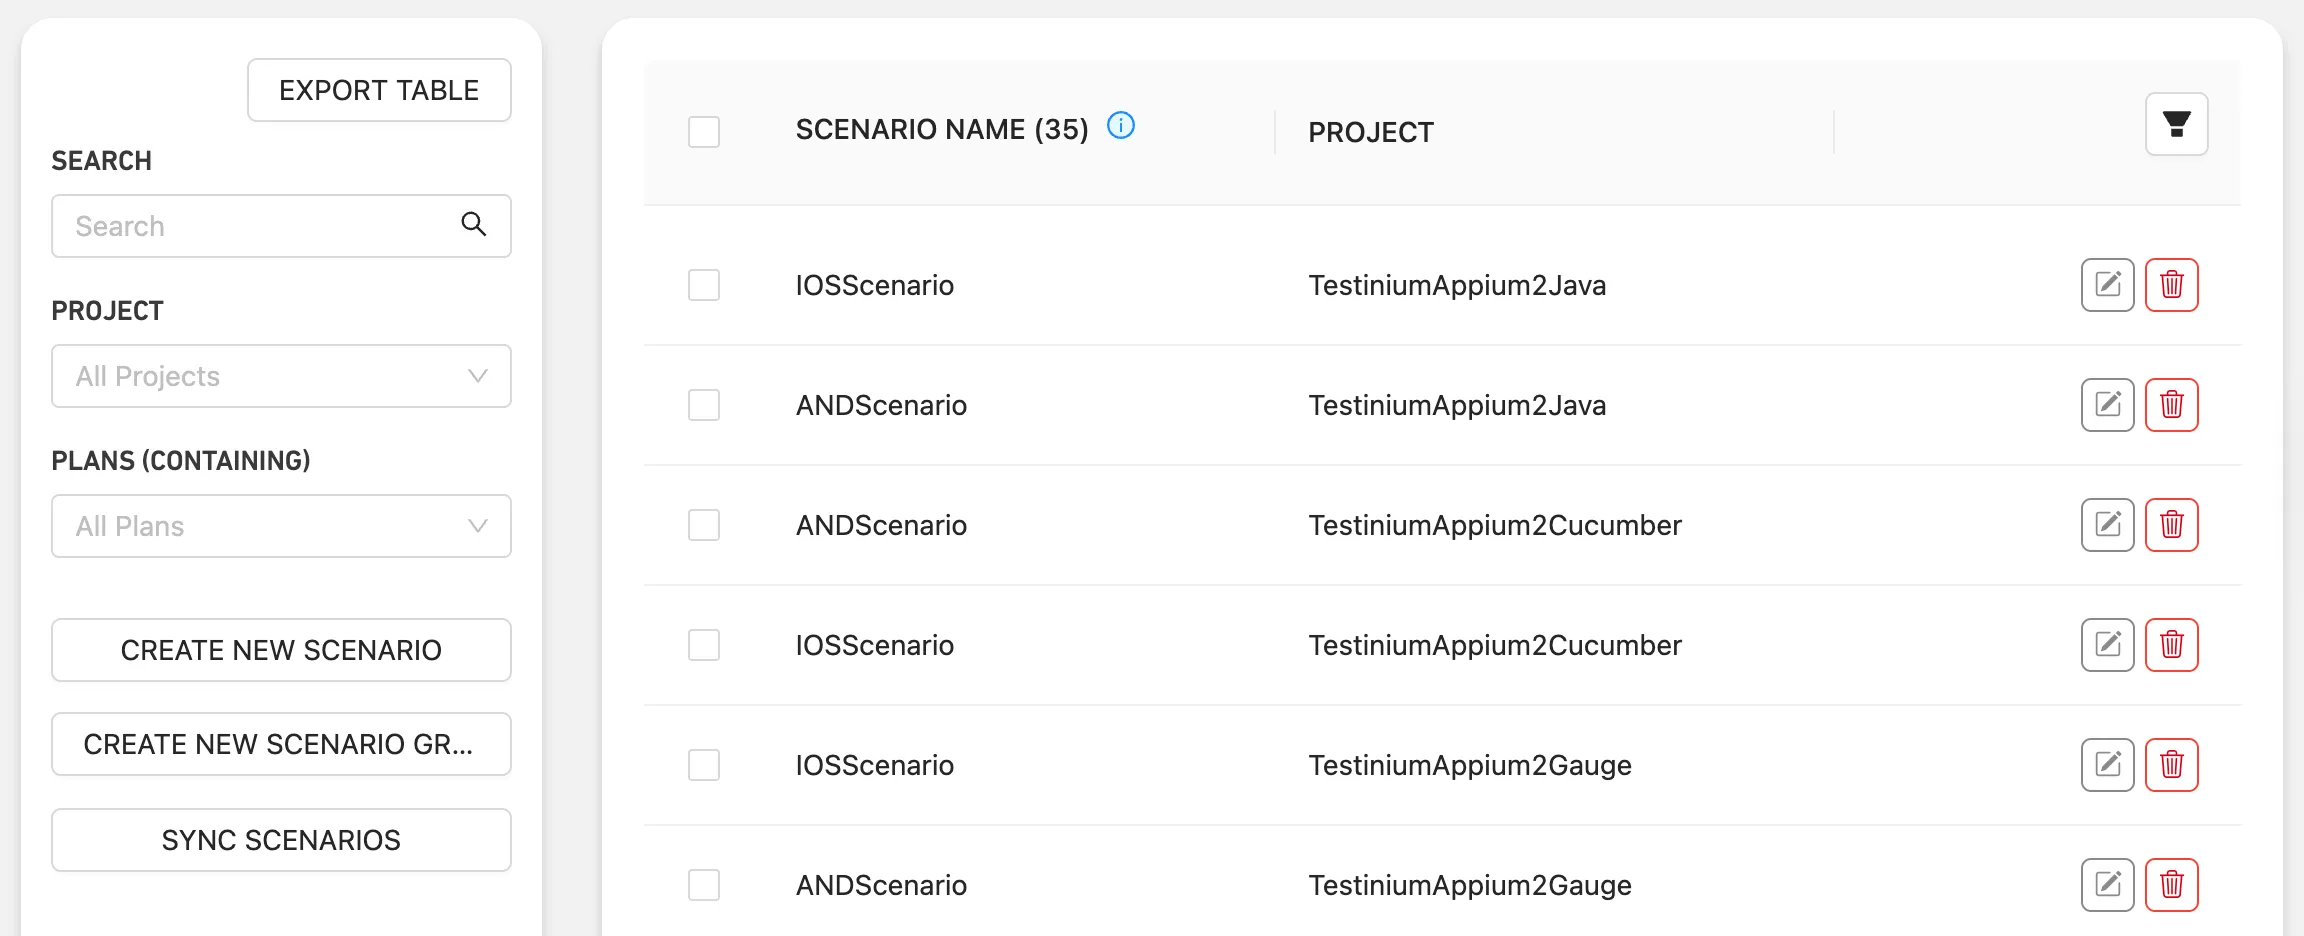
Scenarios are not manually created in the platform. They are automatically discovered from your test project and made available for selection and execution.
How It Works
Testinium Suite executes the test code that you provide.
To enable this, your test project must be structured using supported frameworks. The platform then:
- Scans your project
- Identifies executable test units
- Maps them as Scenarios
- Allows you to select and run them
This means:
- You keep full control over test logic in your code
- The platform handles execution, orchestration, and reporting
➡️ Refer to the supported frameworks documentation for structure requirements.
What is Considered a Scenario?
A Scenario corresponds to an executable unit in your test framework.
Depending on the framework, this may be:
- A test method or class (e.g., Selenium-based projects)
- A scenario inside a specification (e.g., BDD frameworks like Gauge)
- A request or test definition (API testing)
The platform automatically maps these structures into Scenarios.
Creating a New Scenario
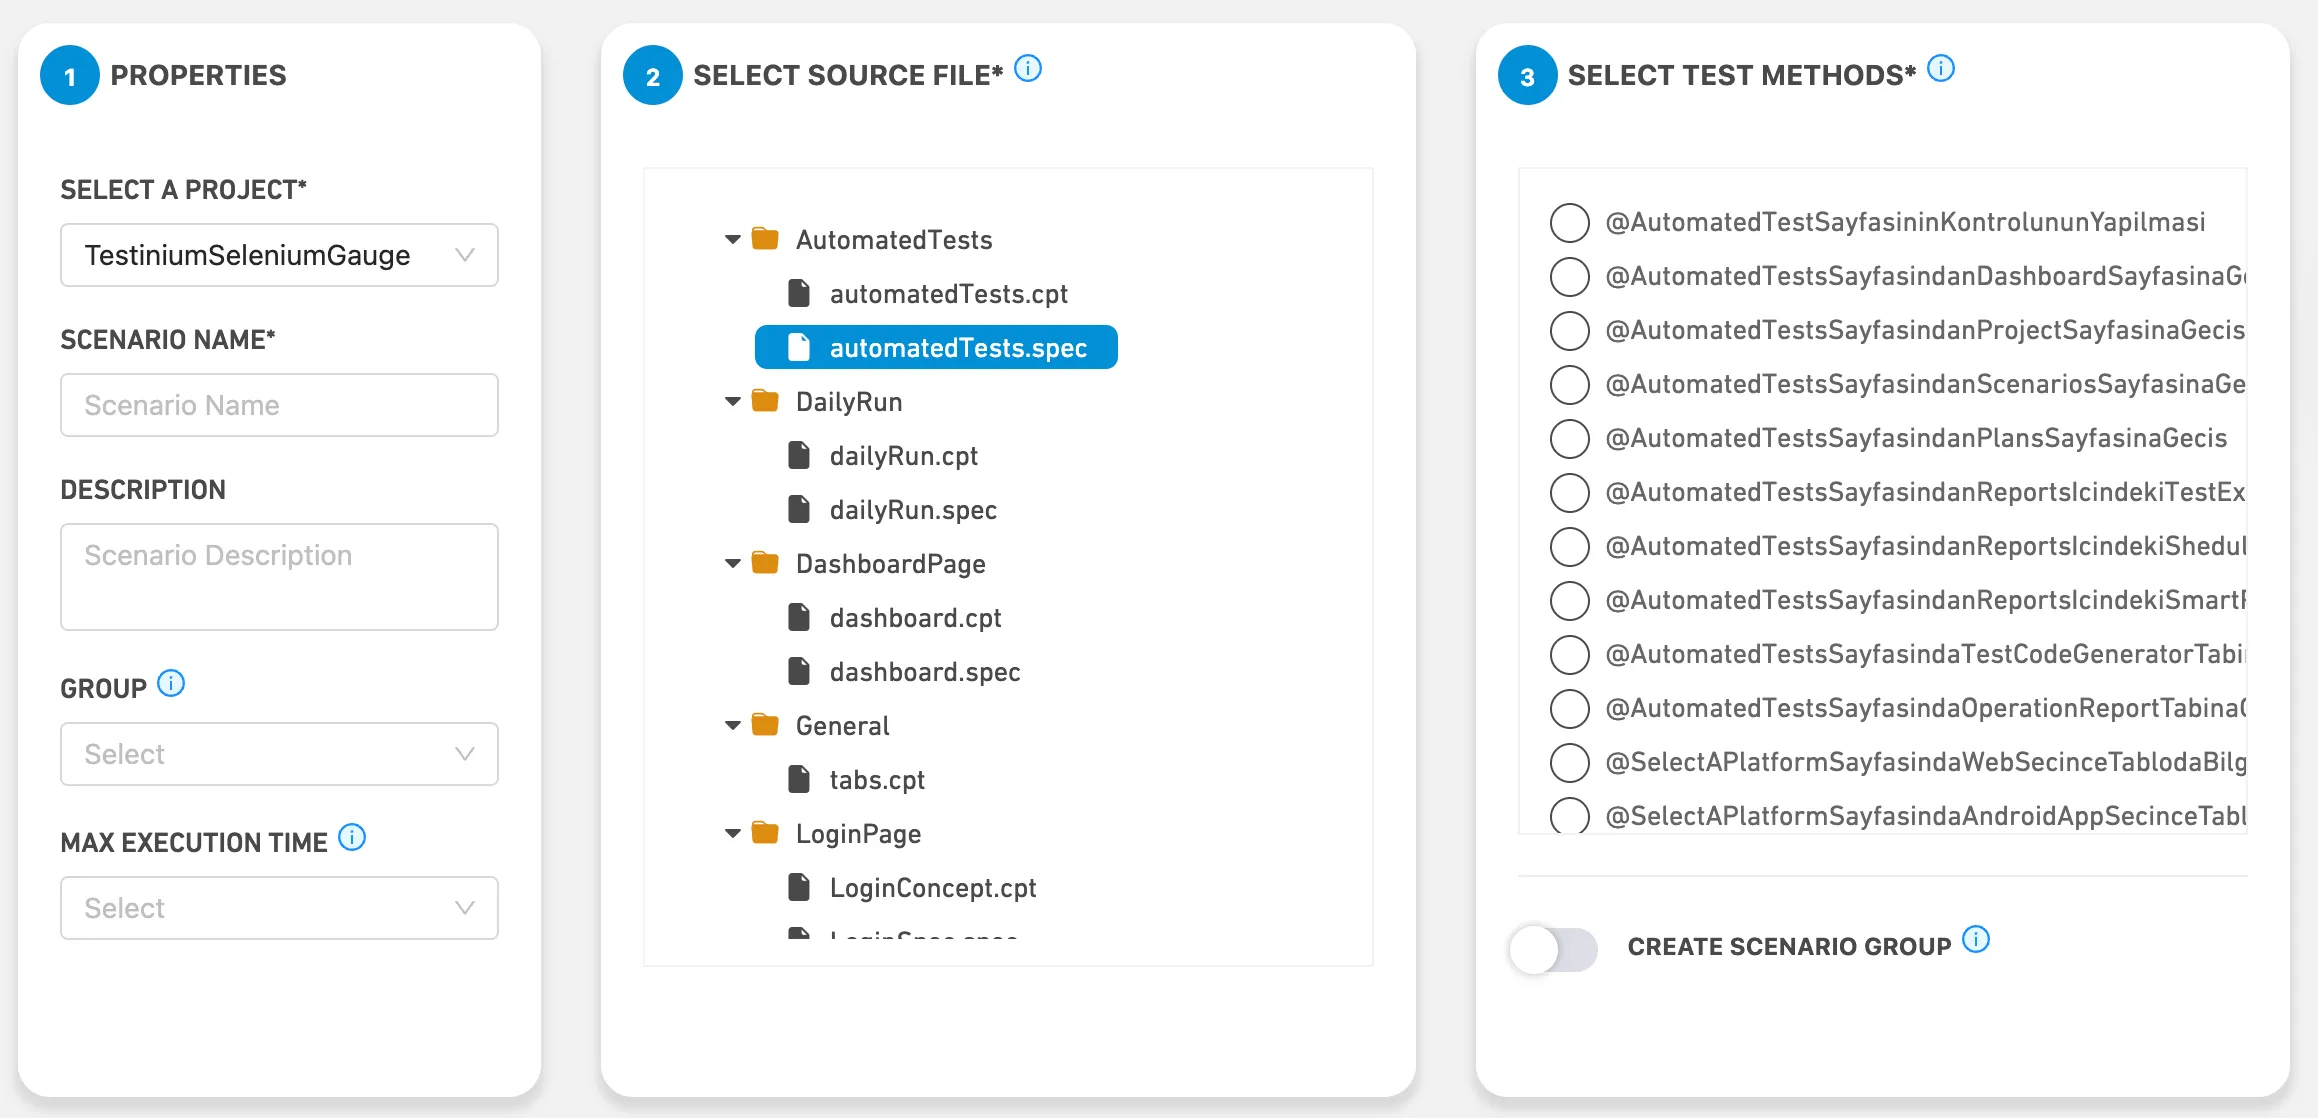
The Create New Scenario screen is used to define and configure a Scenario before execution.
To begin, a Project must be selected. All available options, including source files and test methods, are loaded based on the selected Project.
Clicking the "Create new scenario" button will open the "Create" page, where you can save the progress by clicking the edit button.
Step 1: Properties
In this step, you define the basic information of the Scenario:
- Project Determines which test project the Scenario belongs to. All subsequent selections depend on this choice.
- The "Select a Project" checkbox will show the associated project selected by default, and it will be a disabled field to prevent you from changing the selection.
- Scenario Name A unique name used to identify the Scenario within the Project.
- The Scenario Name field is an addable/removable field; you can change or update your scenario name in this step.
- Description Optional field to provide additional context or details about the Scenario.
- The Description field is an addable/removable field; you can add or update the description field in this step.
- Group Assigns the Scenario to a Scenario Group. This helps with easier selection and management during Plan creation.
- The Group field is a selectable field, and you can select multiple scenarios from the groups listed below.
- Max Execution Time Defines the maximum allowed duration for the Scenario execution. If this limit is exceeded, the execution may be terminated.
- In the Max Execution Time field, you can set the desired durations by selecting one of the following options: “15 minutes, 30 minutes, 1 hour, 2 hours (default), 4 hours, 6 hours, 8 hours, 12 hours”. If a test continues to run until the specified time limit is reached, the test will be canceled.
Step 2: Select Source Files
In this step, you select the relevant source files from your project.
- The list is populated based on the selected Project
- Only files containing executable test definitions are relevant
- This step narrows down the scope for test method selection
- Your test files will be listed from the specified repository, and you can select your test spec from the relevant file.
Step 3: Select Test Methods
After selecting source files, the system lists available test methods.
- You can select one or more methods to define the Scenario
- These methods represent the actual test logic to be executed
- The selected methods form the execution scope of the Scenario
- Your test methods are listed from the given test files. The selected value is your current method; you can proceed by selecting a different method.
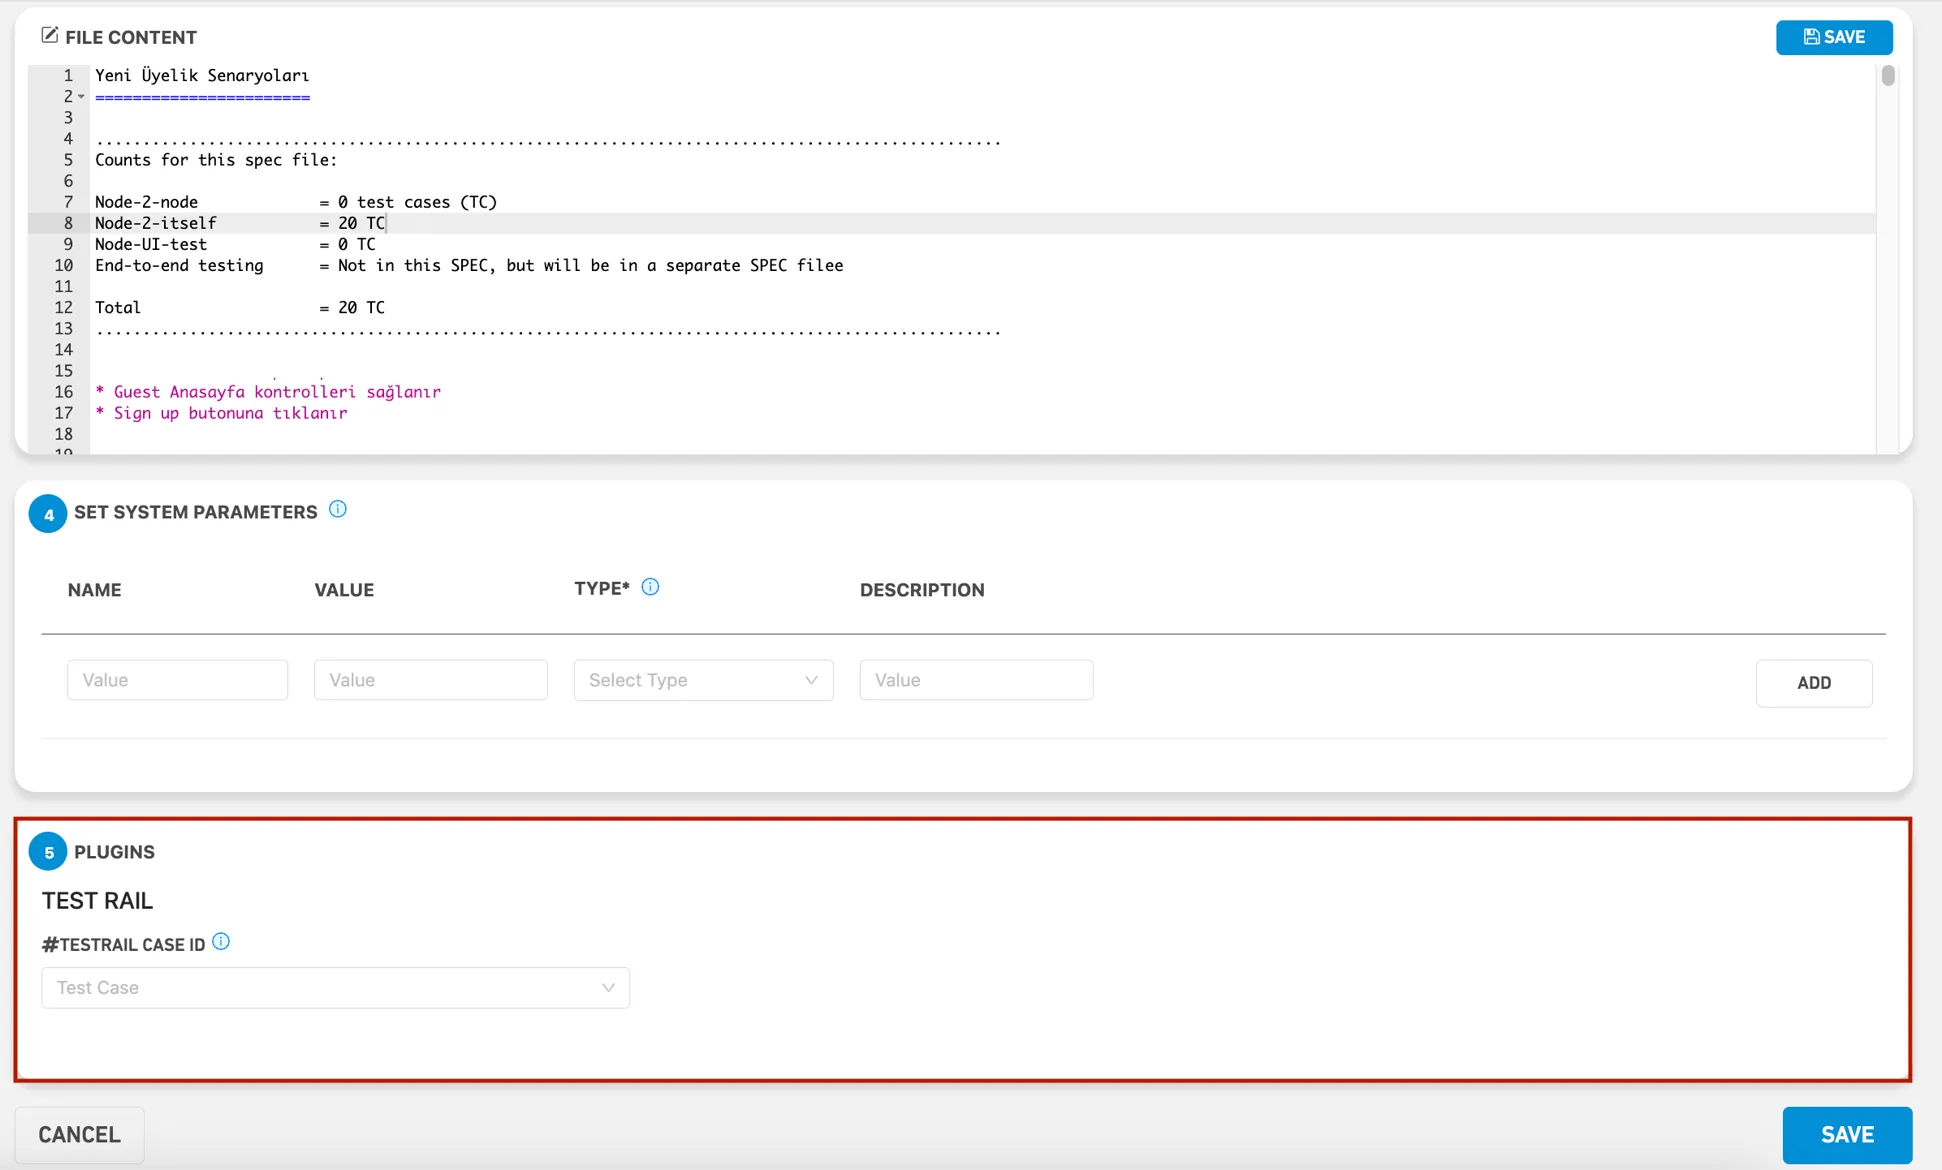
In the middle area, you will see the file content area. This is where you see the contents of your file.
Step 4: Set System Parameters
You can define parameters to be passed into the execution environment.
- Parameters are defined as key-value pairs
- They are injected at runtime
- They can be accessed within your test code
This allows you to customize Scenario behavior without modifying the code.
This section is used to set the application's system parameters.
Name: The name field is an alphanumeric field where you can enter a name.
Value: The value field is an alphanumeric field where you can enter a value you want to define.
Type: The Type field is a selectable field, and two options are listed: Command Parameter and Environment Parameter.
Note: There are two types of parameters: Environment and Command. Environment parameters are exported parameters, while Command parameters are parameters added to Maven commands.
Description: In the Description field, you can enter an expression you want to include as a description.
Once you have entered all the values you want, you can complete the process by clicking the ADD button on the right.
Step 5 (Optional): Configure plugin settings in the Plugins field.
- The plugins activated for the project to which the scenario belongs are included in this field. If there is no plugin activated for the project, this field is not included in the scenario creation screen.
- In the Plugins section, you can select the case ID from the Testrail project you chose from the Testinium project page and select the case that appears in the box.
- You can save your selections by clicking the Apply and Save buttons respectively.
-
Scenario Grouping
Scenarios can be organized into Groups to simplify selection and management during execution.
The primary purpose of grouping is to make it easier to work with Scenarios in the Plan stage, where users select which Scenarios to run.
Grouping allows you to:
- Select multiple related Scenarios more easily in Plan creation
- Manage large Scenario sets without selecting items one by one
- Organize Scenarios logically (e.g., by feature, module, or purpose)
Groups do not affect how Scenarios are executed or reported. They are used only to improve selection and usability within the platform.
How to Use Scenario Groups
There are two ways to create and assign Scenario Groups:
1. Assign Existing Group to a Scenario
- Create a Scenario Group
- Create or edit a Scenario
- Select the desired group from the Group dropdown during Scenario create/edit
2. Create Group During Scenario Creation
- During Scenario creation, enable Create Scenario Group
- Select multiple Scenarios
- The system automatically creates a group and assigns the selected Scenarios
Important Notes
- A Scenario and its Group must belong to the same Project
- A Scenario can belong to only one Group at a time
- If no group is assigned, the Scenario remains ungrouped
Reporting
Each Scenario produces its own result.
Scenarios are executed as part of a Plan, but results are generated and tracked at the Scenario level, not the Plan level.
This means:
- The Plan is responsible for triggering and managing execution
- The Scenario is responsible for producing the actual test result
Accessing Results
Scenario results can be accessed through the Report page.
In the reporting view:
- A Plan run is presented as a cumulative result
- Inside the Plan, each Scenario’s individual result is listed
This allows you to:
- View the overall outcome of a Plan execution
- Drill down into each Scenario to see detailed results
Scenario Results
For every Scenario execution, you can access:
- Execution status (Success, Failed, Error, Skipped)
- Execution duration
- Logs and outputs
- Environment details
These results are stored per Scenario, allowing you to analyze each test independently.
Configure your code with IDE
In the IDE section, you can edit your test code within the test file you want to select. You can also save your changes with the Save button.